Instructions
- You will be making two cutters, one for the tops of
the prosphora and the other for the bottoms. If your seal is larger than a
tomato paste can, find another kind of can which matches the size of your
seal. Make sure you have four of the EXACT same cans (yes, stick with
the same manufacturer, since a small difference in size between
manufacturers will mean this thing won't cut correctly!). The cans for
the bottom cutter should be at least 1/2" wider diameter than the cans for
the top cutter.
- Before beginning, consult the illustrations
below.
- Take your punch and hammer, and poke holes around
the outside of the can, 1/8" down from the rim of the end which has NOT been
cut out. These will give you air holes so the cutter doesn't pull a
vacuum and hold onto the dough. If you poke the holes down by then end
which is cut out, you'll be sorry.
- Poke one hole directly in the top of each
can. Keep it centered. If you want to use three screws or nails,
poke your holes in a triangle (not too close to the rim, otherwise you'll
have a tough time driving them in from the inside of the can).
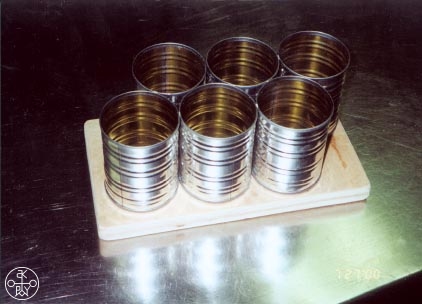
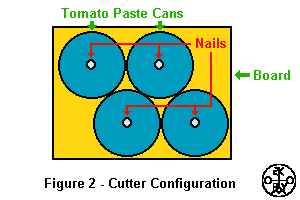
- Now, take a can and use your pencil to trace out
where you want the cans to go. Follow the pattern in Figure 2. Make sure the cans touch at
the rims. This will give them extra stability.
- Trim off any excess wood from the board using your saw.
- Now, nail or screw down each can over the pattern
you traced out on the board. While these directions call for a single
nail or screw in each can, you could use three set in a triangle to give you extra stability.
- If you are ambitious, you can add a handle on the
top for a better grip.
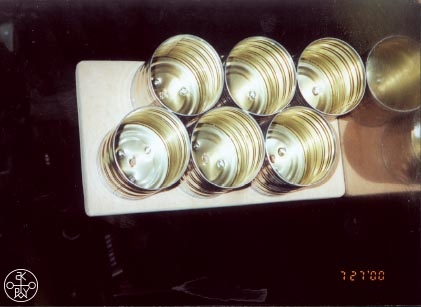
- Once you are done attaching the cans, lay them on a perfectly flat
surface and check to see if all the cans are laying on the counter
evenly. If you have a stray can not lining up (or all the cans seem to
want to separate, run a thin wire (28 guage) around all of the cans and
twist until all the cans are tight together. If the cans are tight
against the board and one another, but there are still a few minor gaps
between some cans and the bottom surface, you may want to sand them all
flat. Wire the cans together as described above. Take a fine
grit wet-and-dry sandpaper and adhere it to a flat surface (I've used
paraffin wax, but spray adhesives are best). Press the cutter against
the sandpaper and gently make circles. Test frequently, and continue
to sand until all the cans sit flat on the surface. After you are
done, use a strip of paper to finish any sharp edges that may form on the
cans.
-
Notes for the creative: you can expand this pattern to any number of cans you can handle without self-injury. If you cannot find cans the right size, an alternative would be to use copper pipe caps, since they are thin and come in a variety of sizes. I don't suggest PVC, since the walls are too thick so it will not cut as well.
 |
 |